Create QR and Barcodes for free
Using Avery Design & Print
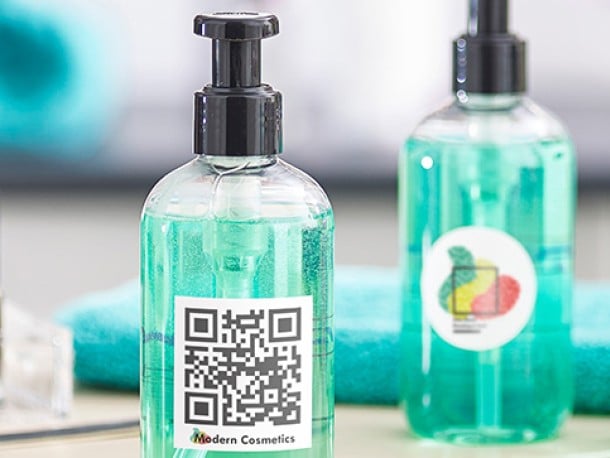
Generate a QR or barcode for free in Avery's Design & Print tool without using external apps. Within Avery's Design & Print barcode generator tool, you can create EAN, QR and over 15 other code types.
Read our step by step guide below to find out how to get started with our barcode tool.
Step 1
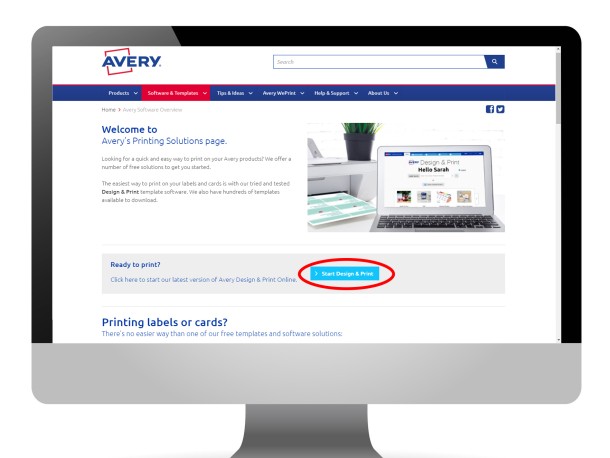
Open Design & Print
To use the web version of Design & Print go to www.averyproducts.com.au/print and click the blue Start button to open.
Step 2
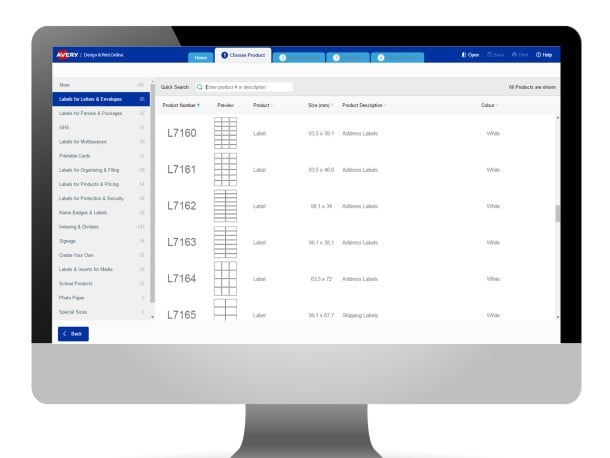
Find your Avery product
The fastest way to find a template is to enter your product's software code in the Quick Search box. You can also search by product description, click on the column headings to sort by size, product description, colour or layout.
Click the green Select this Product button to move forward.
Step 3
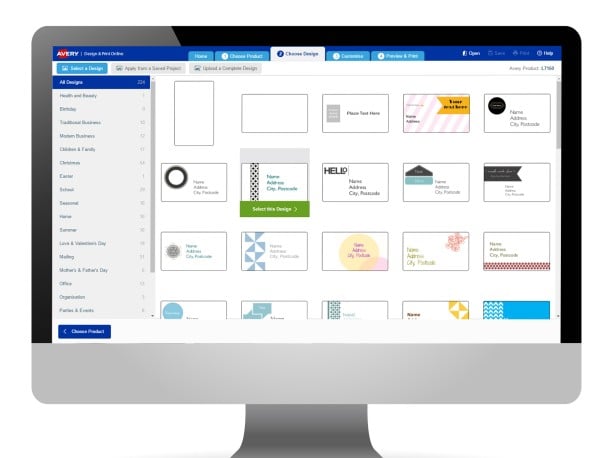
Choose your template design
On the Choose Design tab, you will find the blank and pre-designed templates available for your chosen Avery product. You can narrow your choice by selecting a design category from the list on the left.
Click on the design you’d like to customise and a green Select this design button will appear. Click that template again to continue.
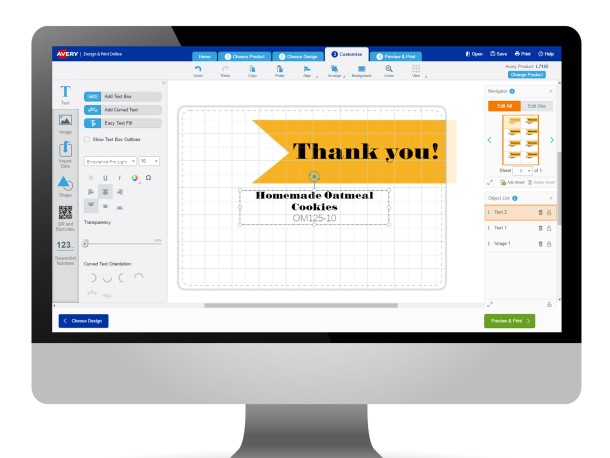
Step 4
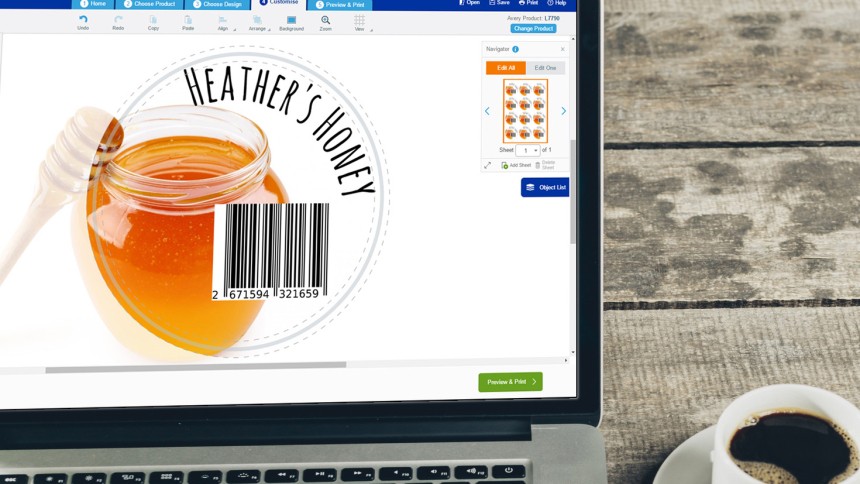
Customise your label
You are now on the Customise Screen, where you can edit and personalise your product. On the left hand side of the screen are your item tools. This is where you can choose to add text, images and other objects to your design.
When you select a tool an additional set of options will appear. There will be different options, depending if you select Text, Image or Shape.
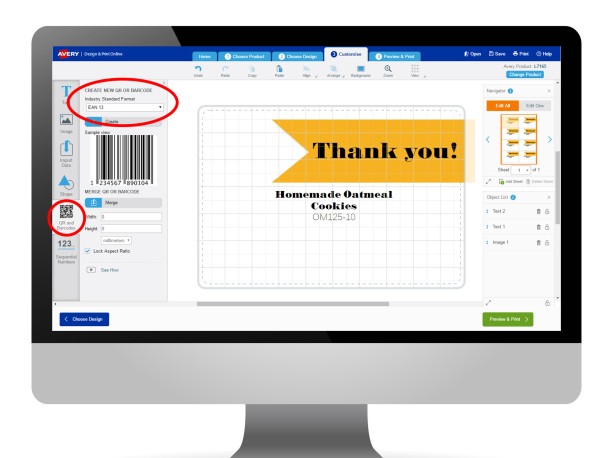
Step 5
Select your Barcode Type
When you are ready to add your barcode, click the QR and Barcodes icon on the left hand side. From the toolbar that appears, you can then select which barcode type you would like to create from the drop down list.
Once you have selected the barcode type, click on
- Create to generate a single barcode from a code that you have or
- Merge if you would like to generate a number of barcodes from an excel list of code numbers.

Step 6
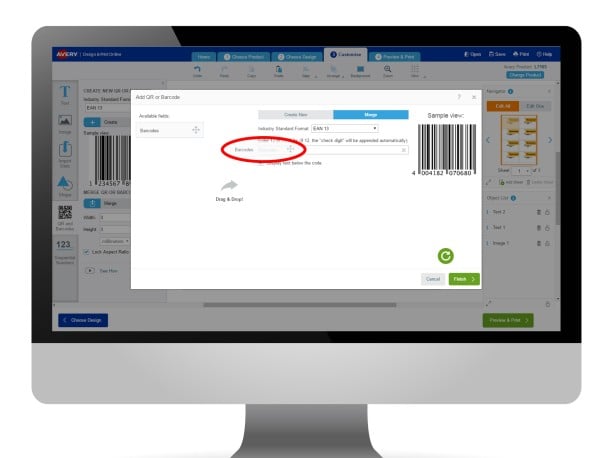
Create a single barcode - Input your code number
If you have clicked Create, the above screen will appear. Enter your barcode’s number into the box and press the green round arrow to see your generated barcode. Then click Finish.
Please note: Avery are not barcode experts; we offer free software which will turn barcode numbers into scannable barcodes. We recommend that you obtain barcode requirements from the appropriate authorities to ensure you are creating the barcode to specification.

Step 7
Create multiple barcodes using our Merge Feature
If you clicked Merge, you will be asked to browse for your barcode file on your computer. Once selected, you will be taken to the above screen to select which information from your spreadsheet you would like to add to your barcode. Only tick the column with the barcode numbers/URLs , then click Next.
Step 8
Merge your barcodes to your label
On the next screen, your barcodes field will be on the left. Drag and drop this to the box in the middle of the screen to add your fields to design. Click Finish to see the merged labels on the design canvas.
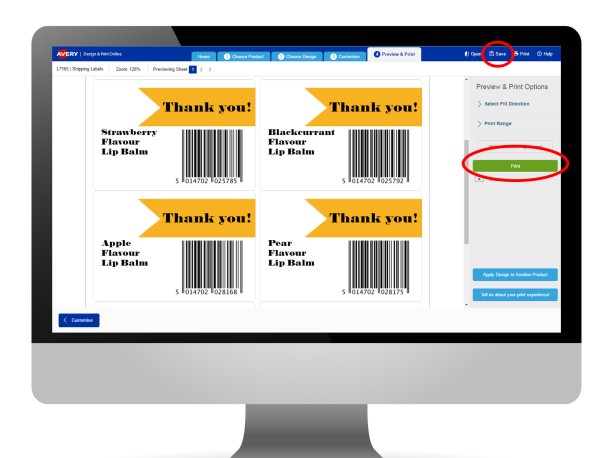
Step 9
Save and Print
When you’re happy with all of your labels, click Save and choose to save your labels to your Avery Account (so that you can access it from any computer connected to the Internet) or to your computer. (It will be saved as a “.avery” file – which can be opened again from Design & Print and edited whenever you need)
Once saved, click print and Design & Print will generate a PDF – we recommend you open this with Adobe Acrobat if possible. You can now print directly onto your labels or save your PDF to print later.
Step 10
Need some more help?
If you would like some more help with using the Merge Function in Design & Print, click here to see our detailed Step by Step.
https://www.averyproducts.com.au/software/how-to/import-and-merge-data
Alternatively, we also have a dedicated help video on barcode creation, which you can view here.
In addition, our consumer centre are always on hand to help if you get stuck:
1800 644 353
email: [email protected]