Using Avery Design & Print's Import Data Feature
How Mail Merge can save you time
The term "Mail Merge" describes a process which takes data from one source and applies it to another. By using Avery's Import Data feature you can rearrange information into a new format at the touch of a few buttons. Mail merging is perfect for producing address labels, invitations and mass mailings, and Avery’s free Design & Print software includes this feature within it. This Step by Step guide shows you how to do it.
Step 1
Prepare your data
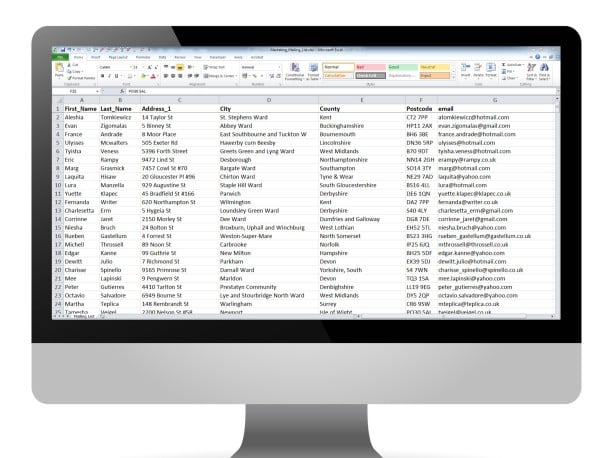
It is possible you already have your information in an excel spreadsheet, but if not, your data needs to be collated into different cells.
First, create a “Header Row” which features descriptive titles such as First Name, Last Name, Address 1, Town, County, Postcode etc... Then populate the rows underneath with the correct information.
Step 2
Open Design & Print
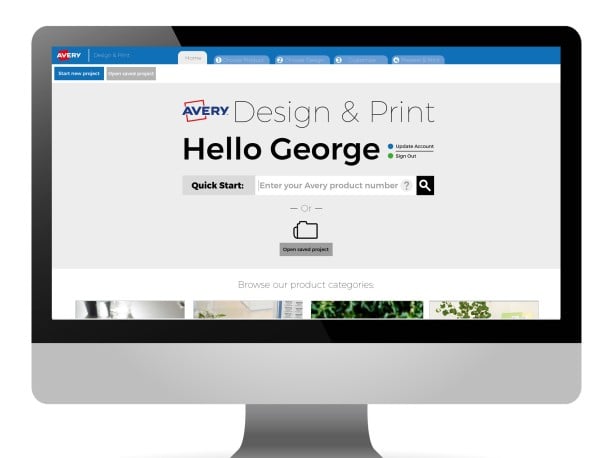
To access Avery Design & Print, click Software & Templates> Avery Design & Print on the menu at the top of this screen.
Enter your Avery product’s software code into the search bar and click the blue “go” button
For this step by step guide we have used L7160 – a sheet of 21 address labels.
Step 3
Choose your template
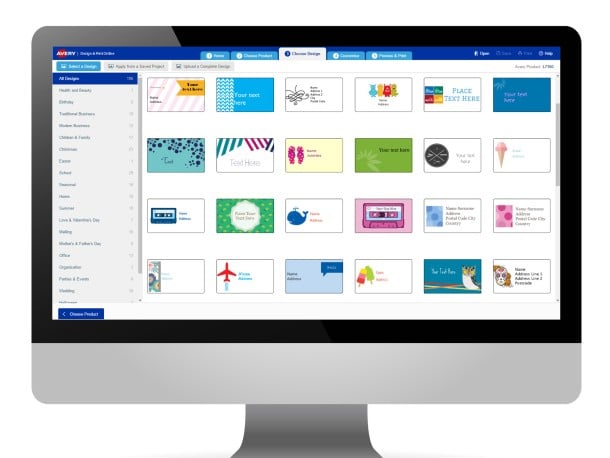
On the Select Design screen you can either choose a blank template to create your design from scratch, or choose from one of our predesigned templates to edit
Step 4
Customise your template
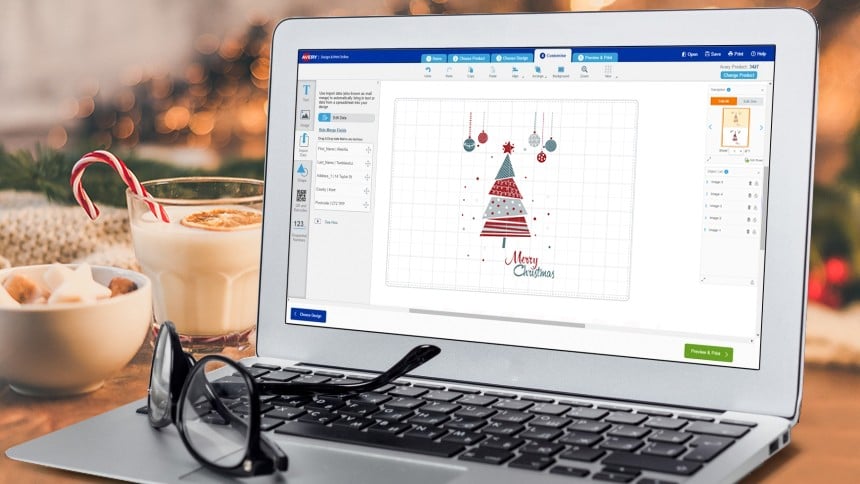
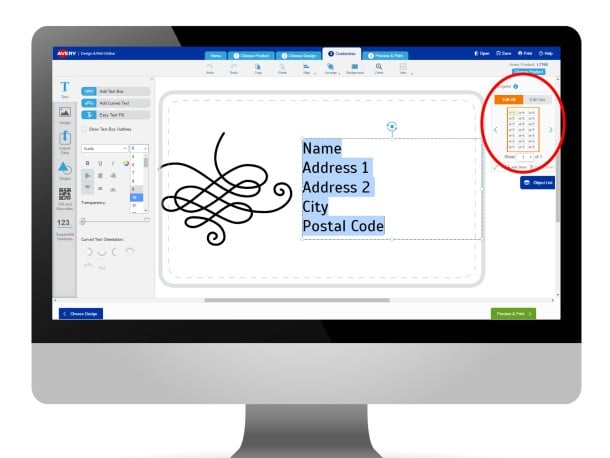
With the “edit all” button selected on the right, move the design around to your liking. You may want add an image or a border for example. When you are happy with the look of the label, click “Import Data” on the left hand side of your screen, and then the "Import Data" button when the tab pops out.
Step 5
Merge your data
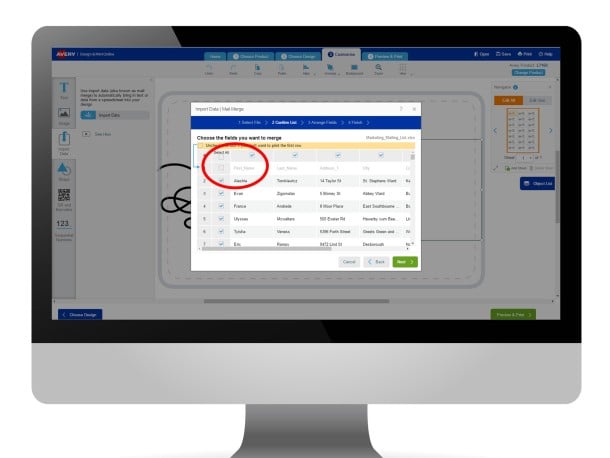
Click the “Browse for file” button, and navigate to the location of the spreadsheet on your computer. The above screen will appear. If you do not want your header row of titles on your labels, remove the tick from row 1. You can also deselect any columns you don't want to see on your labels. When ready, click “next”.
Step 6
Arrange your data fields
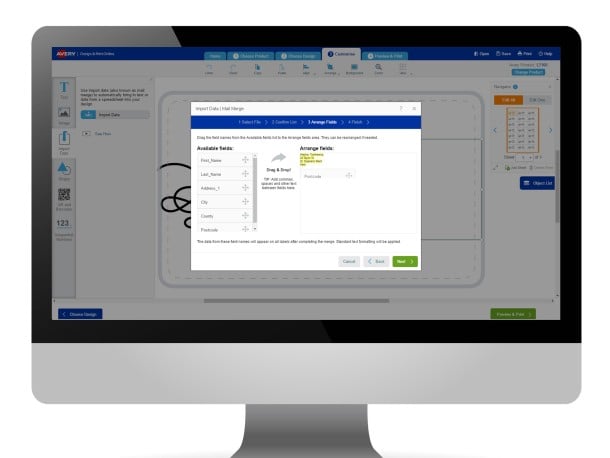
On the next screen, you can arrange your data fields into the order you would like them to appear on your label. Drag the data headings from the left hand side and drop them into the box on the right. You can drop fields next to each other if you would like the information to appear next to each other on the label.
Step 7
Complete the merge and format your labels
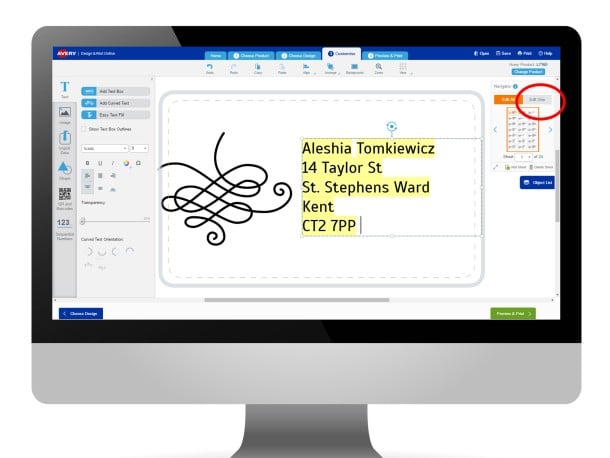
When you click “Finish” your data will automatically be transferred to individual labels.
If you still have “edit all” selected on the right hand side of your screen, you can now format all your addresses at once. Simply highlight the address on any label on your canvas, then change your font, its size, the colour or relocate the text field to where you want the addresses to be placed on the label. You can also add images and borders.
IMPORTANT: If you want to make changes to individual labels (perhaps if one address is longer than the others), click “Edit one” on the right-hand side before editing that specific label.
Step 8
Save and Print
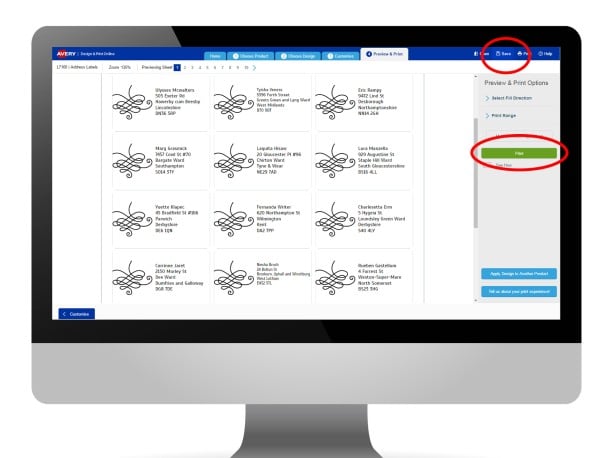
When you’re happy with all of your labels, click Save and choose to save your labels to your Avery Account (so that you can access it from any computer connected to the Internet) or to your computer. (It will be saved as a “.avery” file – which can be opened again from Design & Print and edited whenever you need)
Next, click the green “Preview & Print” button. This will take you to a preview screen where you can check your labels. When happy click “Print” again. Design & Print will now generate a PDF – we recommend you open this with Adobe Acrobat if possible. (Read more about this here). You can now print directly onto your labels or save your PDF to print later.

