Magnetic Sheets for DIY Fridge Magnets

Magnetic sheets are a versatile and user-friendly material that can be a game-changer for your DIY projects. One of the primary benefits of using magnetic sheets is their flexibility. These sheets can be easily cut into various shapes and sizes, making them perfect for creating custom fridge magnets that fit your specific needs and creative vision. The adhesive backing found on many magnetic sheets simplifies the application process, allowing you to attach your designs effortlessly.
Another significant advantage is the durability of magnetic sheets. Unlike traditional magnets that can chip or break over time, magnetic sheets are designed to withstand wear and tear. This makes them an excellent choice for projects that will be handled frequently, such as fridge magnets. Their strong magnetic pull ensures that your creations will stay securely in place on any magnetic surface, providing both aesthetic appeal and practical functionality.
Moreover, magnetic sheets are highly versatile, opening up a world of creative possibilities. Whether you want to create photo magnets, decorative pieces, or functional items like to-do lists and memo boards, magnetic sheets can do it all. Their adaptability means you can experiment with different materials, such as fabric, paper, or even lightweight wood, to craft unique and personalised magnets. This versatility allows you to let your imagination run wild and explore endless creative avenues.
The Ultimate Guide to Using Magnetic Sheets
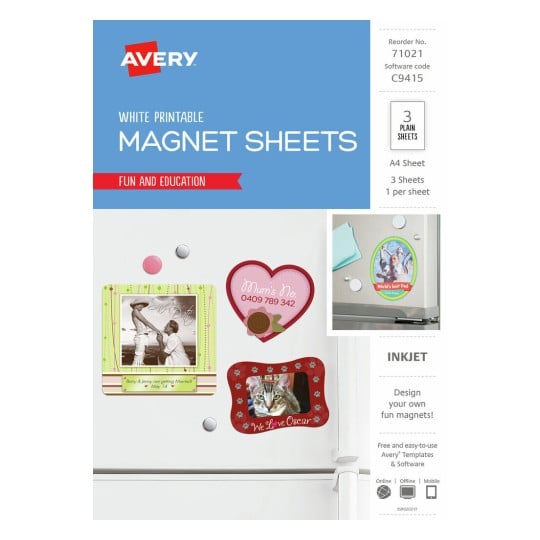
First and foremost, you’ll need magnetic sheets. Depending on your project, you can choose from flexible, adhesive, or printable magnetic sheets. Make sure that your printer is compatible with the material.
Next, gather your design elements. This can include anything from photographs, printed graphics, fabric, scrapbook paper, to lightweight embellishments like buttons, ribbons, or stickers. The possibilities are endless, so feel free to get creative and experiment with different materials to achieve the desired look for your magnets.
You’ll also need basic crafting tools such as scissors, a craft knife, a ruler, and a cutting mat. These tools will help you cut your magnetic sheets and design elements to the desired shape and size.
Creating your own DIY fridge magnets is a fun and rewarding process that allows you to showcase your creativity. Follow this step-by-step guide to craft beautiful and functional magnets that will brighten up your kitchen and keep your important reminders in sight.
Step 1: Plan Your Design
Start by brainstorming and planning your design. Think about the theme, color scheme, and materials you want to use. Consider the purpose of your magnets – whether they’re decorative, functional, or a combination of both. Sketch out your ideas on paper to visualise the final product and make any necessary adjustments before you begin.
Step 2: Gather Your Materials
Once you have a clear design plan, gather all the necessary materials and tools. This includes magnetic sheets, design elements, scissors, a craft knife, a ruler, a cutting mat, and adhesive if needed. If you’re using printable magnetic sheets, make sure your printer is set up and ready to go.
Step 3: Cut the Magnetic Sheets
Measure and mark the dimensions of your magnets on the magnetic sheet using a ruler and pencil. Use scissors or a craft knife to carefully cut out the shapes. If you’re creating intricate designs, a craft knife and cutting mat will provide more precision. For adhesive magnetic sheets, peel off the backing and set the adhesive side aside for later.
Step 4: Prepare Your Design Elements
Cut your design elements to match the size and shape of your magnetic sheets. If you’re using printed graphics or photos, make sure they are trimmed neatly and fit perfectly on the magnetic surface. For fabric or other materials, ensure they are cut to the appropriate size and shape.
Step 5: Attach the Design Elements
For adhesive magnetic sheets, simply peel off the backing and press your design elements onto the adhesive side, smoothing out any wrinkles or bubbles. For regular magnetic sheets, apply a strong adhesive or craft glue to the back of your design elements and press them firmly onto the magnetic surface. Allow the glue to dry completely before handling the magnets.
Step 6: Add Finishing Touches
Once your design elements are securely attached, you can add any finishing touches or embellishments. This can include decorative elements like buttons, ribbons, or stickers. Make sure any additional embellishments are lightweight and securely attached to prevent them from falling off over time.
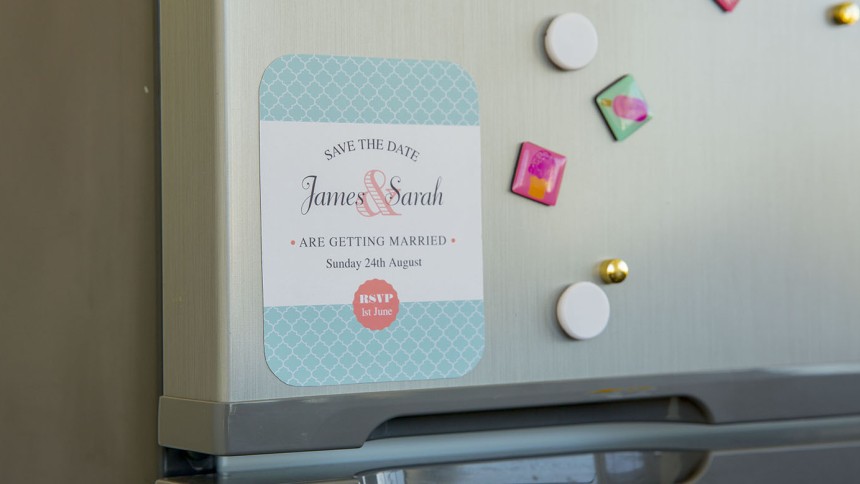
- Photo Magnets
- Inspirational Quote Magnets
- Seasonal and Holiday Magnets
- Functional Magnets - To do List, Shopping List, Memo Boards
- Nature-Inspired Magnets
Proper care and maintenance can extend the life of your DIY fridge magnets and keep them looking their best. Follow these tips to ensure your magnets remain in top condition.
Clean Your Magnets Regularly
Over time, magnets can accumulate dust and grime, which can dull their appearance. Clean your magnets regularly using a soft cloth and mild soap. Avoid abrasive cleaners or scrubbing too hard, as this can damage the surface of your magnets.
Store Magnets Properly
When not in use, store your magnets in a cool, dry place away from direct sunlight. Avoid stacking magnets on top of each other, as this can cause them to stick together and become difficult to separate. Store them flat to prevent bending or warping.
Handle with Care
While magnetic sheets are durable, it’s essential to handle your magnets with care to prevent damage. Avoid dropping or bending your magnets, and be gentle when attaching and removing them from the fridge. Treat any delicate embellishments with extra care to prevent them from falling off.
Reattach Loose Elements
If any elements of your magnets become loose over time, reattach them promptly to prevent further damage. Use a strong adhesive to secure any loose pieces and allow the glue to dry completely before using the magnet again. Regular maintenance can keep your magnets looking fresh and intact.
Refresh Your Design
If your magnets start to look worn or outdated, consider refreshing the design. You can easily update your magnets by adding new elements or covering the existing design with new materials. This allows you to keep your fridge decor current and exciting without starting from scratch.