How to print on Avery Labels that are not A4 in size
Not all Avery products are in A4 format. We also offer a range of smaller label sheets that you can print on.
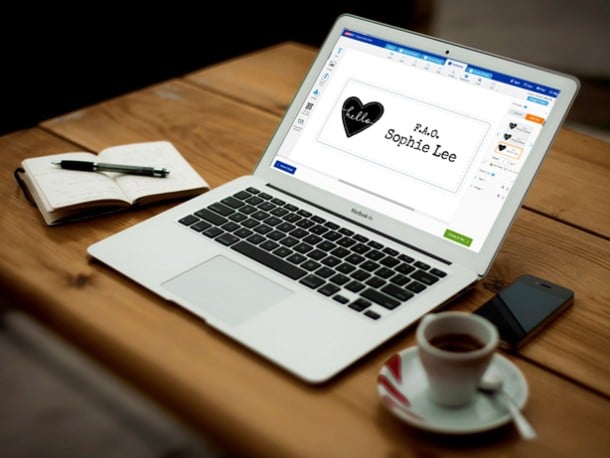
We recommend using our free Design & Print tool to create your labels. Choose a template, customise your design, then generate a PDF ready to print. This guide will walk you through how to print non‑A4 documents, whether they’re PDFs or Word files.

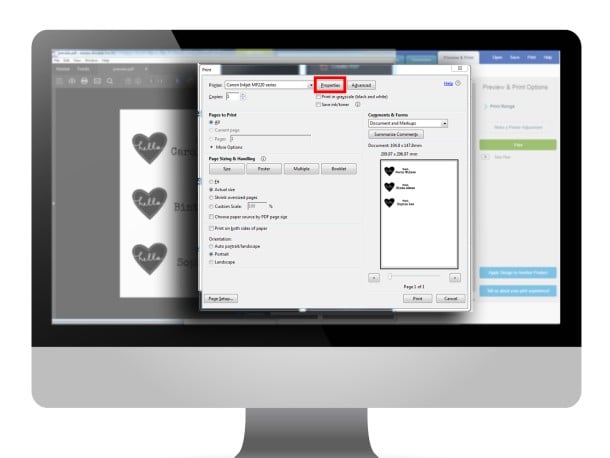
Step 1
Open your printers' properties
When you are ready to print, click File>Print. Next, click on your printer’s Properties Button to access your printer’s more comprehensive settings.
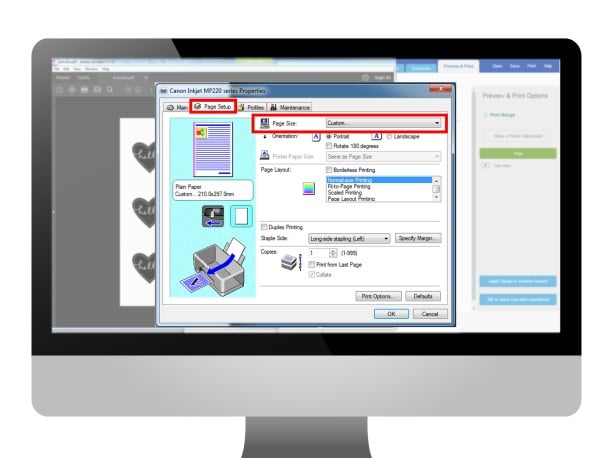
Step 2
Adjust the page size
Find the section where you can choose the size of your paper. This might be called Page setup or Page size. Your printer’s default should be set to A4 as default. It may have A5 or A6 as options in its drop down. If not, choose Custom.
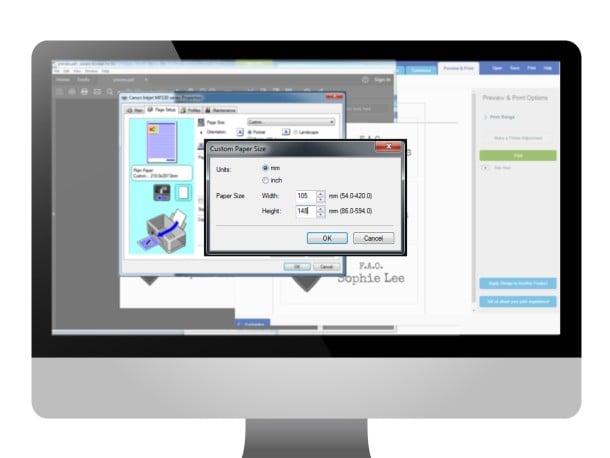
Step 3
Select the correct Paper Size
If your Avery product is half the size of a usual label sheet, it is A5. If it is ¼ of the normal size, it is A6. When the custom size dialogue appears enter the following measurements:
For an A5 sheet: Make your width 148mm and your height 210mm
For an A6 sheet: Make your width 105mm and your height 148mm
(Check your printer manual for more information on printing custom paper sizes)
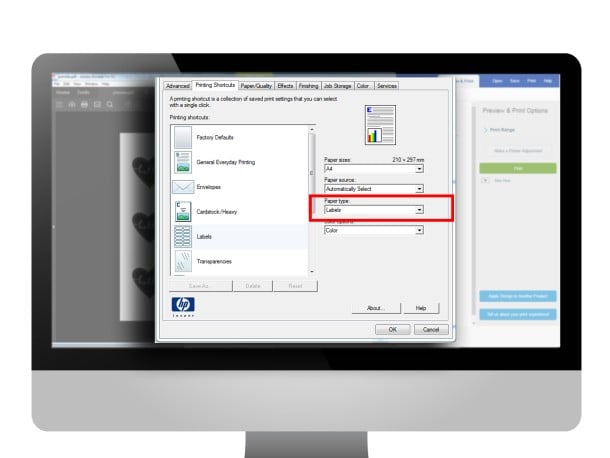
Step 4
Select the correct Paper Type
Find the section on your printer settings where you can select what kind of material you are printing on. This might be under the option Paper Type. For example, see if you have a Labels setting when printing labels (or Heavyweight if Labels is not available).
Step 5
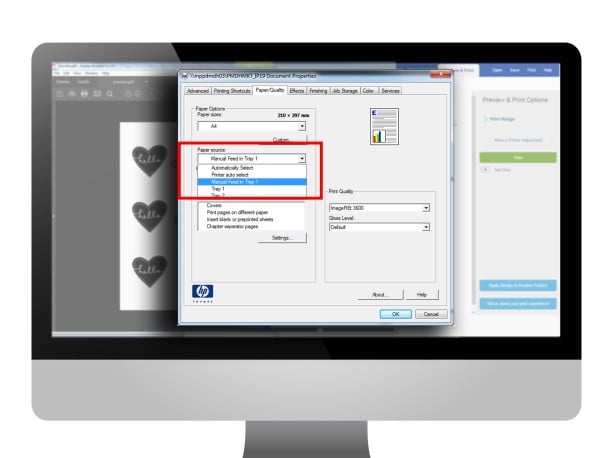
Select Paper Source
Ensure that you have the Rear Paper Tray or Manual Feed selected
Step 6
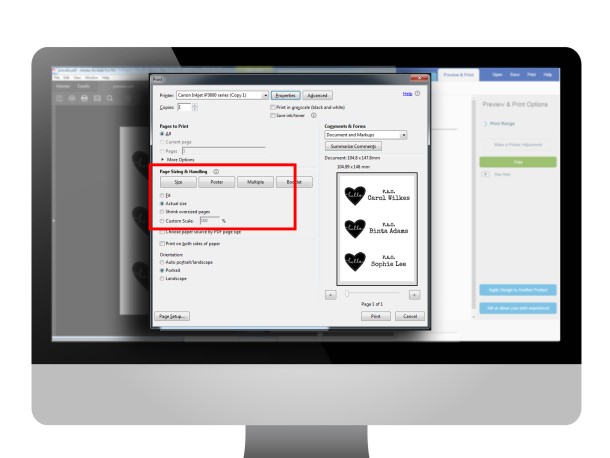
Page Scaling Settings
The most important setting to select is making sure that your design prints Actual Size or Scale: Custom 100% (depending on browser you are using).
Make sure that your page scaling is not set to “Fit to Page” or “Scale to Fit”.
Test then print
Finally, before printing on your Avery product, we always recommend you perform a test print on a plain sheet of paper. Hold the printed sheet behind the Avery product to check the alignment of your layout. When satisfied with the layout, print on to the Avery product.